Happy Sunday babies!
I love Sunday. Several reasons why, but mostly because:
The Walking Dead is on.
Have I mentioned I have a huge crush on Norman Reedus?? Oh... I have?? Mmmm... anyway!!
Today's project I've talked and talked about. Talked about it with Drew. Talked about it with Mandy.
Searched Pinterest and Google looking for tutes. How hard could making your own functioning indoor shutters REALLY be?
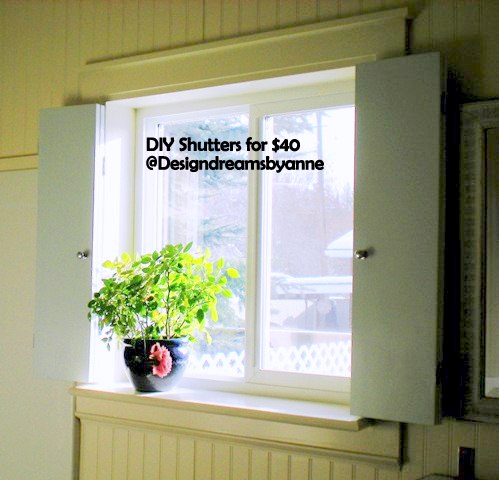
Anne started my obsession with her bathroom shutters:
In my searching I came across the exact look I was going for here:
When I took the curtains down in Merry's old room, I found this:
The blinds were barely hanging on. Perfect opportunity to try out the shutter idea.
First, I had to beef up the molding to give the shutters something sturdy to hang from.
Trusty MDF and crown to the rescue:
This time I added a sill as well. This window has a killer view and I thought the kids would enjoy a larger space to rest their furry butts.
BTW, I HATE working with crown. But, Drew had a revelation of epic proportions during this battle with crown molding. See those tiny side pieces? They can be a nightmare to try and get right.
To get them right, you just cut a smaller piece, identical to the large piece you just cut, then cut it in half, and reduce it to fit from there. It worked like a charm! HOLLA!!
While the caulk dried, I went out and made the actual shutters.
Now, when I was at Home Depot deciding what wood I should use, I struggled. I didn't want these to be super heavy and I wanted them to have a very rustic and aged look.
As I walked through the lumber, I found the rough cedar fence planks.
They were cheap, lightweight, VERY rustic and cedar smells divine.
Went through the pile to find the pieces that weren't too chewed up {These are cheap for a reason. Can be cracked, broken, they are heavily knotted and VERY rough} and had really nice knots and texture.
Cut all the boards, laid them together and glued everything together with liquid nails.
Then, I took 2 scrap pieces, liquid nailed and screwed them to the top and bottom of each section.
Then we used a narrow hinge to attach the 2 sections.
I wanted this shutter to fold in half, then flat back against the wall.
I sanded the heck out of the whole thing.
This rough cedar is VERY rough and can splinter you very easily. Also, you can see that if you get a little too aggressive with your drilling, it will crack. I learned the hard way that you need to gently pulse the drill to keep it from splitting. It's all good, I wanted rustic.
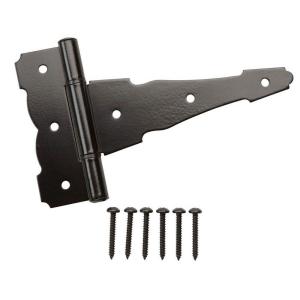
After all the paint had dried on the window casing and the shutter, we used gorgeous black gate hinges to attach the shutter:
Picked these up at Home Depot also.
Honestly, I'm just a little proud with how these turned out:
Every time I do molding, it gets better and better, not to mention easier.
Let's all pretend that I'm not obviously trying to hide the satellite cord with the giant flower vase, shall we? {goofy grin}
Earlier in the week, I had recovered an ugly, but very functional storage basket with a scrap of white chenille.
Before:
After:
The kids love it too. I adore chenille.
Also added a $2 handle to help open and close the shutter.
And I'm tellin ya what. These do an awesome job of blocking the sun. So well, I had a hard time getting any decent pictures of what it looks like closed.
Do you guys love the gate hardware? I'm in love.
I'm going to do a similar version of these in the Master bedroom. Those windows are much larger, so there will be a double set like this.
This one window took me all day yesterday.
So, I will plan that project out over a couple weekends so I don't overwhelm myself.
I am BEYOND thrilled with how this room is turning out.
No, we don't see the cable, right??
LOVING this space.
Still lots of plans, but this is one my favorite projects to date.
What do you think?
Disclaimer:
I don't think that this type wood {rough cedar} would be a wise choice for a childs room.
It splinters easy and could be an issue for little hands.
Since there are only adults and cats here, I feel pretty safe with it.
XOXO
Enjoy that extra hour of daylight! I am!!


Great job!!! and thank you for the shout-out, you're a doll!!
ReplyThey look fabulous. You certainly should be proud of yourself!!
xox
Meg, Your shutter turned out beautiful, so did your storage basket! The room is so fresh and inviting! Pinning. Thanks for the inspiration and share!
ReplyThat looks so awesome! And your pictures are gorgeous, too. Can I move in?! ;)
ReplyYour shutters turned out awesome! The room is pretty darn cute too. Love what you are doing in there. Love your sense of humor too. :) And what satellite cord were you talking about, anyway!? All I saw was a big vase with poppies and some really cool DIY shutters ;)
ReplyThey turned out absolutely amazing!
ReplyI LOVE the shutter! It looks awesome - and that hardware definitely makes it.
ReplyI bet kitties are loving the new window sill, too :D
AWESOME project... just what I want at my kitchen sink, but painted distressed red. Great job on casing the window as well!
ReplyWow!!! That shutter is really, really awesome!!!
ReplyThey came out great! I luv the idea... One son moving out... new sitting room planned. That will be a wonderful idea for that room.
ReplyThanks for sharing :-)
Hugs, Gee
Are the poppies from your yard? They're gorgeous. Love your shutters, love your bulletin boards and love your covered basket top. How do you find the energy to do all that when you work? Love the trim you put around the window.
ReplyHow is Brandi doing? Hope she's doing ok at least. I think about her often. Happy Week
Thanks so much!
Brandy is hanging in there. She seems to be pretty happy, and that's all that matters!
XO
Merry is going to want to move back into this awesome space.
ReplyYou truly amaze me. Nail gun, air compressor, moulding. Wow. I'm humbled.
It looks fabulous - very rustic but perfect for what you are trying to achieve.
On another note - loving the blue dresser too. Did you do that also? What colour? MMS or ASCP?
Thanks Heather!
The chest was done with homemade chalk paint. Not my favorite. I will have to check the paint can for the name of the color. :-)
Meg,
ReplyThe shutter looks great and adds such charm. Love the light that comes from that window.
Cynthia
This is stunning!! Look at you with all your powertool savviness!! I'm jealous!
Replywow, those shutters look amazing...since you are getting so good with the wood framing, perhaps you can come visit me and practice a bit more at my house?? LOL...will have to pin this. New Blogger here
Replyhttp://littlebrags.blogspot.com
I think you need to charge for house tours. I am so in love with what you have done with your house. I would be the first in line. You should be very proud! You Meg, are an amazing woman. I hope the kitties are well. They are so lucky to have you!
Replylove the colors and cheeriness in here. the shutters add a great texture, too. enjoy!
ReplyI love these! Turned out wonderful! I gotta make some of these! Thanks for sharing! Glad to have found your blog!
Reply